Combining Traditional and CAD/CAM Techniques for Simplifying Dental Implant Therapy
Received: 11-Jan-2016 / Accepted Date: 28-Jan-2016 / Published Date: 04-Feb-2016
Abstract
Despite the undisputed advantages of dental implant therapy, a considerable number of patients cannot benefit from such treatment due to limited financial resources. In addition to the advent of reliable low-cost implant systems, the use of Computer Aided Design/Computer Aided Manufacturing (CAD/CAM) for fabricating implant-supported restorations may help to overcome this problem. This article presents a clinical case of two implants inserted in the fourth quadrant and restored with a cementretained Fixed Dental Prosthesis (FDP). The implant system used featured a pre-mounted multipurpose abutment used for implant insertion, impression making and as a basis for the definitive restoration. Following manual adaptation of these abutments for achieving a common path of insertion, a three-unit FDP was manufactured using a CAD/CAM system. By combining old-school and up-to-date prosthetic fabrication techniques it was possible to successfully restore this patient in a reliable and esthetic way.
Keywords: CAD/CAM; Implant therapy; Esthetics; Predictability
78864Introduction
Dental implant therapy provides undisputed benefits for several indications particularly when pristine neighboring teeth are present or when the patient could otherwise only be restored using removable dental prostheses [1,2]. However, in many instances, limited financial resources hinder patients from seeking implant therapy [3]. While on the top-end of the spectrum incredible options exist for improving the planning phase [4], the hard and soft tissue situation as well as the restorative outcome of a specific patient, little attempts have been made for reducing treatment costs [5].
Given the high level of experience and predictability gathered with premium dental implant systems [2], several companies emerged over the past years offering low-cost dental implants often with a limited number of prosthetic options. Similarly, CAD/CAM technology in the laboratory field has in some areas overcome conventional labor-intense fabrication techniques e.g. for manufacturing restorative frameworks [6]. Furthermore, the advent of zirconia ceramic led to the replacement of expensive noble alloys in many indications [7].
It is therefore the goal of this case presentation to show the predictable implant treatment of a patient combining a low-cost implant system as well as traditional and modern fabrication techniques for reducing treatment cost.
Case Report
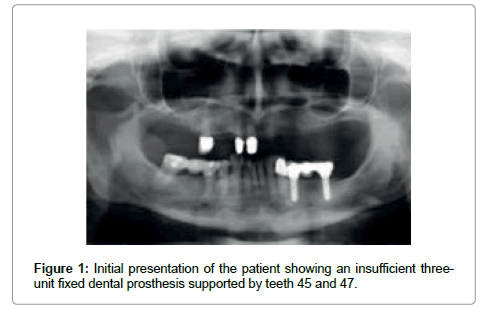
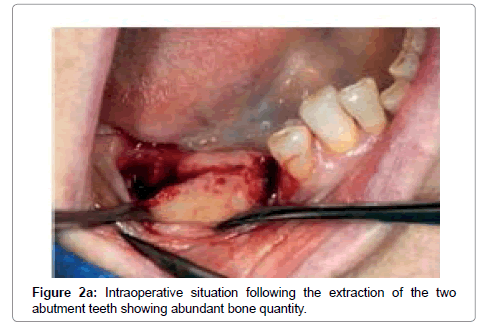
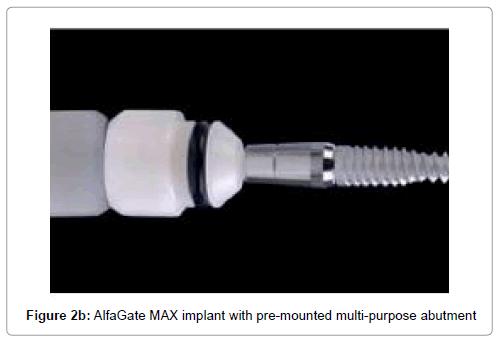
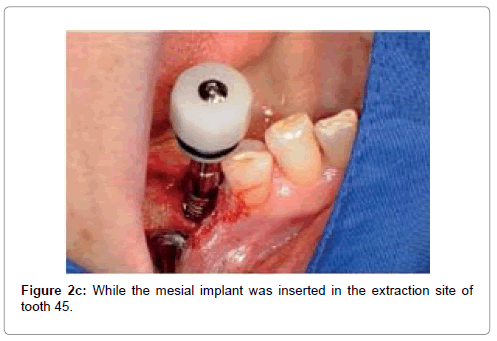
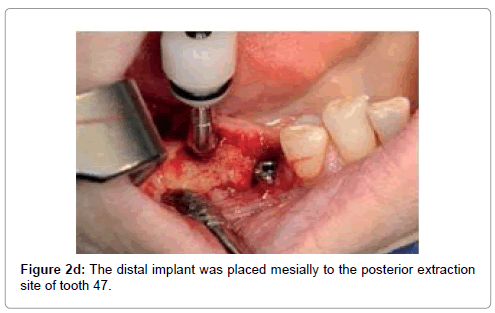
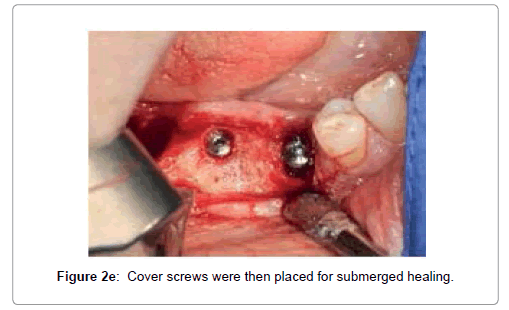
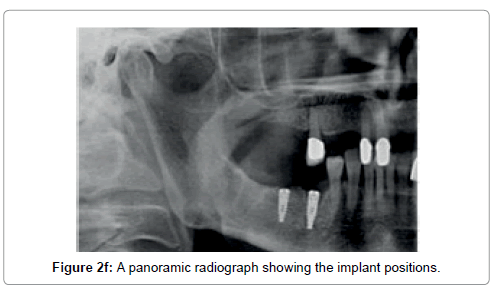
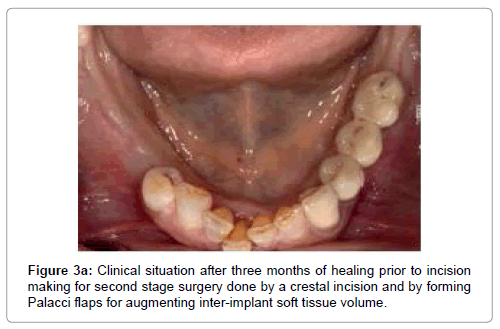
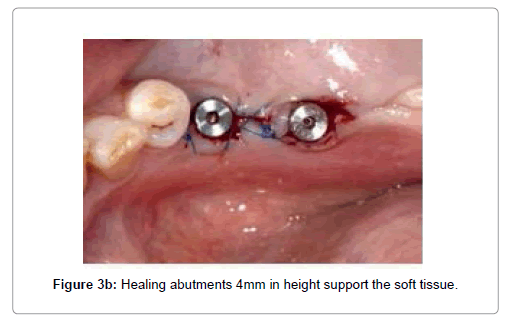
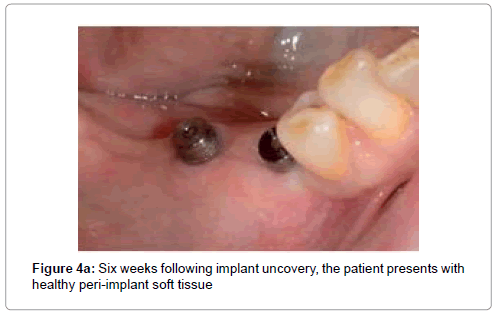
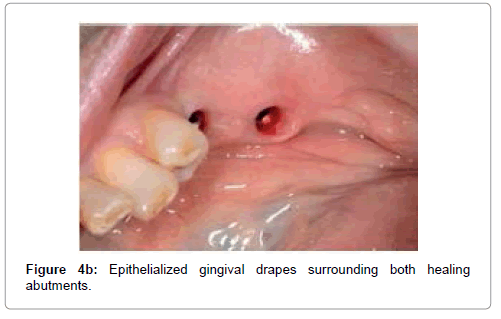
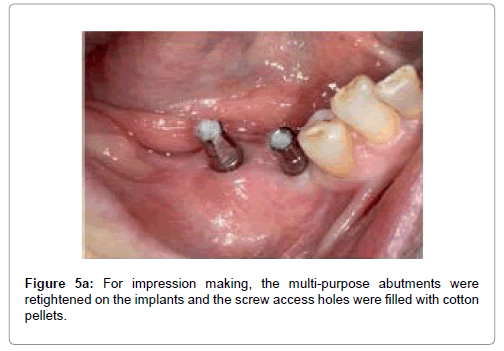
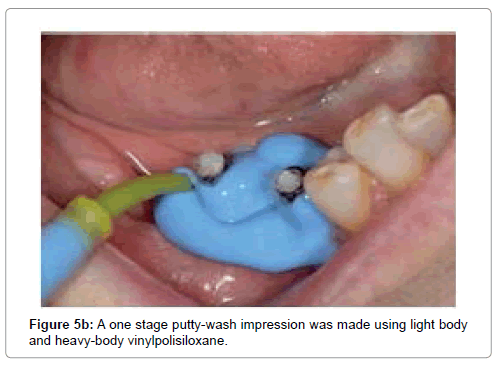
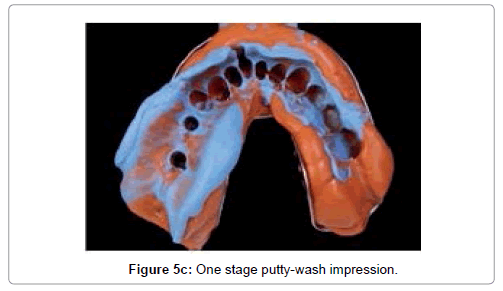
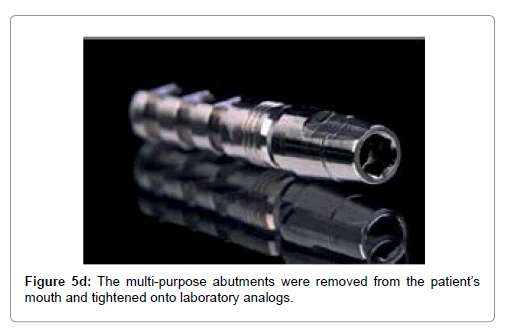
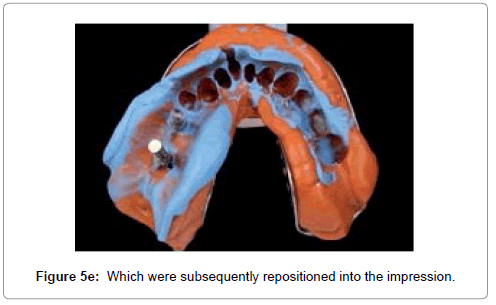
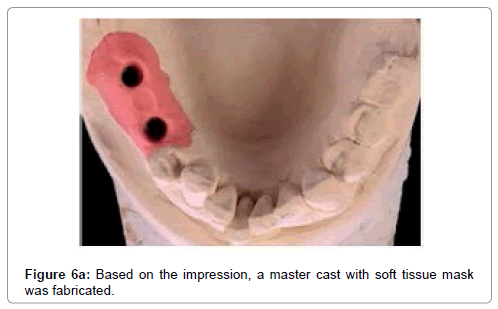
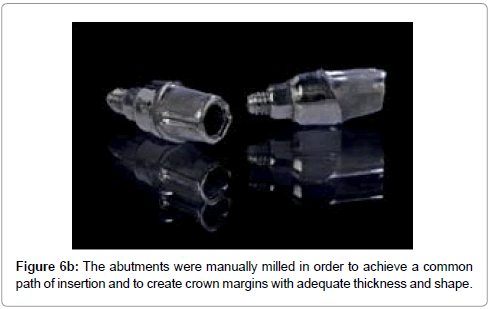
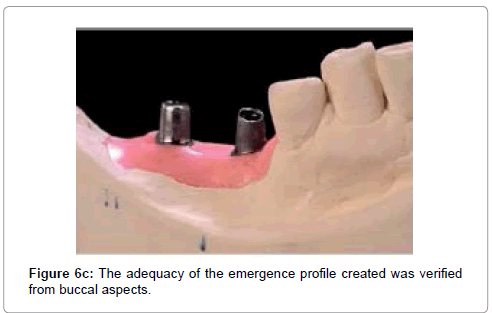
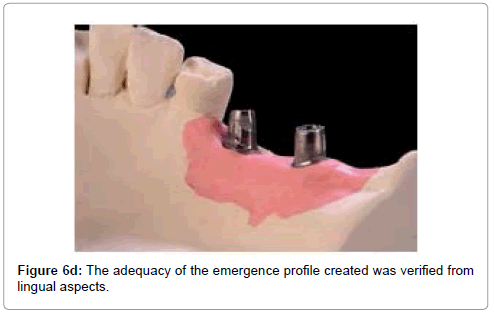
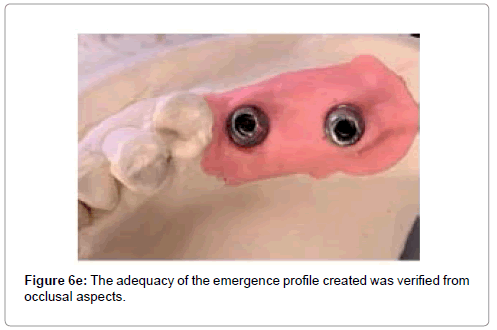
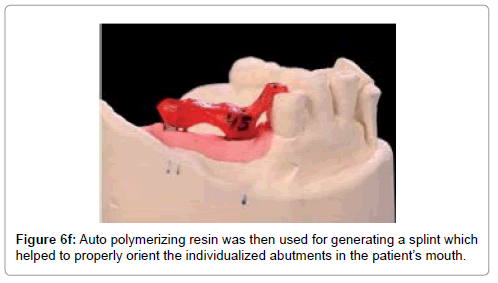
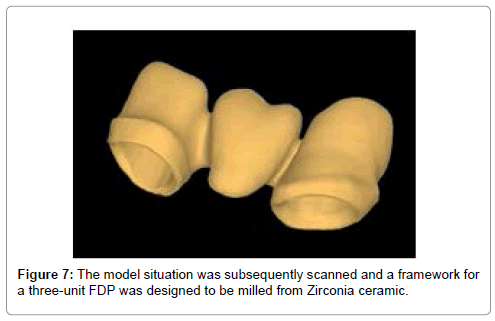
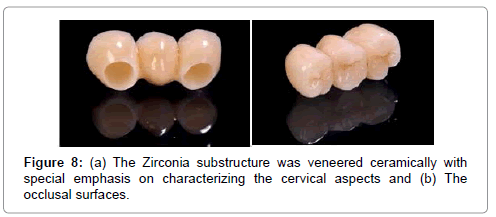
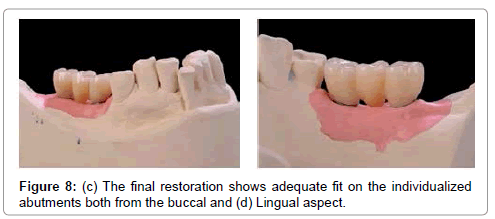
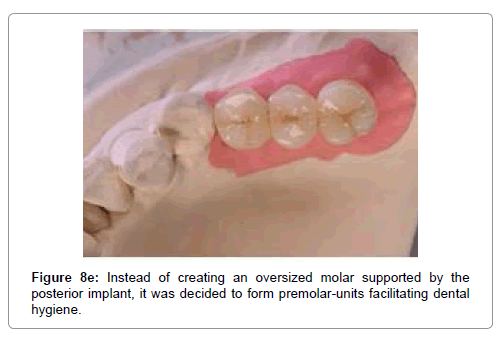
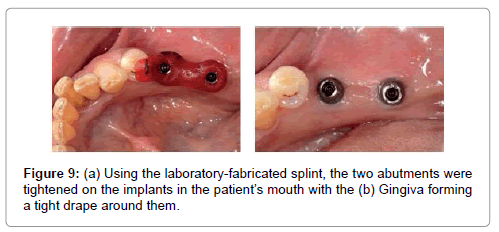
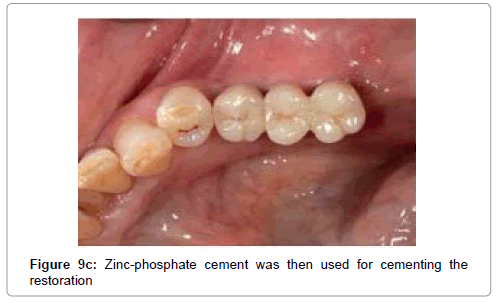
A 75-year old female patient presented with a failing fixed dental prosthesis supported by the lower right second premolar and second molar ( Figure 1). Both teeth were symptomatic and after an unsuccessful attempt of endodontic treatment, it was decided to extract both teeth and to place dental implants immediately ( Figure 2a). Due to the patient’s limited financial resources, a low-cost dental implant system with a pre-mounted multi-purpose abutment ( Figure 2b) was used (MAX implant, Alfa Gate, Kfar Qara, Israel). While the anterior implant could be installed in the extraction socket of the first premolar ( Figure 2c), the posterior implant was placed mesial to the extraction site of the molar where sufficient bone quantity was available ( Figure 2d). Cover screws were placed on both implants for submerged healing prior to radiographically verifying the implant positions (Figures 2e,2f). After a healing period of three months (Figure 3a), the implants were uncovered trying to optimize soft tissue conditions by manipulating existing gingival volume (Figure 3b). Six weeks thereafter, the patient presented with healthy peri-implant mucosal conditions ( Figures 4a,4b) suitable for impression making. To this end, the multipurpose abutments were again tightened on the implants and the screw access holes were covered with cotton pellets (Figure 5a) prior to the closed tray one stage putty-wash impression (Figures 5b,5c) using addition silicone (Affinis, Coltene Whaledent, Langenau, Germany). The multipurpose abutments were then connected to laboratory analogs (Figure 5d) and repositioned into the impression (Figure 5e) before the master cast was poured in stone (Figure 6a) and mounted in an articulator. A manual milling machine was utilized for creating a common path of insertion and definitive margins for both of the multipurpose abutments (Figures 6b-6e). For simplifying the abutment insertion process in the patient’s mouth, a tooth-supported stent was made from autopolymerizing resin (Figure 6f). The master cast with the modified abutments in place was digitized by means of a laboratory based scanner (DEGOS STAR Z –SCAN Ultra 4000, DEGOS Dental, Regenstauf, Germany) and a framework for a three-unit restoration was designed virtually (Figure 7). Afterwards, the framework was milled from Zirconia ceramic in an external milling center (Zirkondioxid HT, Cadstar, Bischofshofen, Austria). Manual veneering of the framework (Cercon Ceram Kiss, Degudent, Hanua, Germany) was then performed for achieving adequate function and esthetics of the final restoration (Figures 8a-8e). After the laboratory phase, the abutments were tightened on the implants in the patient’s mouth using the resin guide and a torque of 25Ncm (Figures 9a-9c). With the crown margins located exactly at the gingival level, the FDP could easily be cemented with zinc-phosphate cement.
Discussion
From a prosthetic point of view it has been argued that low-cost dental implants may result in compromised long-term performance due to increased levels of micromotion at the implant abutment interface as compared to established implant systems [8]. While such statements are often based on in vitro research, clinical data on this question is widely missing. The implant system used here is characterized by an internal hexagon prosthetic platform which is in widespread use in a variety of implant systems [9].
The multipurpose abutment [10] used here allows the clinician to visualize the implant position during the insertion process while the antirotational feature (flat outer surface) ensures proper positioning of the laboratory implant - abutment assembly into the closed tray impression. During the laboratory stage, the wall thickness of this abutment allows for compensating non-parallelism of implants. However, depending on the degree of implant disparallelism, this may be a labor intensive process and it should be checked whether preangled abutments might constitute an alternative option.
CAD/CAM fabrication of prosthetic frameworks from zirconia ceramic followed by veneering has come into wide-spread use with excellent long-term results being reported in current publications [11]. The use of cement-retention seemed to be unproblematic in this patient as the finish lines have been raised by the individualized abutments so that potentially harmful cement remnants could easily be removed [12] which should be conducive to long-term survival of the restoration.
Instead of strictly following either the traditional or the modern CAD/CAM way for restoring dental implants, the advantages of both options were combined here. In addition to transfer components, traditional fabrication techniques require stock abutments which in combination with waxing sleeves form the basis for modelling a specific restoration which is subsequently cast using metal alloy. The framework obtained can subsequently be ceramic veneered either by layering or overpressing. The major disadvantages of this approach are the greater number of implant components needed plus the cost for alloy which may be substantial when high-noble material is used. As waxing, casting and finishing procedures are time consuming, the approach chosen here only included the individualization of abutments purchased in combination with the implants. Strictly adhering to CAD/ CAM principles would have meant that following model scanning requiring a scanbodies, CAD/CAM abutments would have been fabricated involving additional cost. Instead, the modified abutments were scanned and comparably inexpensive restorative material was used for obtaining the framework.
Overall, this case certainly not presents high-end implant dentistry with respect to planning, implant positioning, loading protocol and pink esthetics but it demonstrates how regular patients can be restored predictably with a minimum of interventions and cost.
References
- Kim Y, Park JY, Park SY, Oh SH, Jung Y, et al. (2014) Economic evaluation of single-tooth replacement: dental implant versus fixed partial denture. Int J Oral Maxillofac Implants 29: 600-607.
- Pjetursson BE, Asgeirsson AG, Zwahlen M, Sailer I (2014) Improvements in implant dentistry over the last decade: comparison of survival and complication rates in older and newer publications. Int J Oral Maxillofac Implants 29: 308-324.
- Kalsi JS, Hemmings K (2013) The influence of patients' decisions on treatment planning in restorative dentistry. Dent Update 40: 698-710.
- Zimmermann M, Mehl A (2015) Virtual smile design systems: a current review. Int J Comput Dent 18: 303-317.
- Kumari P, Verma M, Sainia V, Gupta A, Gupta R, et al.( 2015) Mini-Implants, Mega Solutions: A Case Series. J Prosthodont.
- Baumgarten HS, Wunsche A (2015) CAD/CAM Fabrication of Definitive Implant Prostheses: A Digital Workflow From Planning to Implant Placement to Final Restoration. CompendContinEduc Dent 36: 746-755.
- Denry I, Kelly JR (2008) State of the art of zirconia for dental applications. Dent Mater 24: 299-307.
- Gigandet M, BigolinG, Faoro F, Bürgin W, Brägger U (2014) Implants with Original and Non-Original Abutment Connections. Clin Implant Dent Relat Res 16: 303-311.
- Pita MS, Anchieta RB, Barão VA, Garcia IR Jr, Pedrazzi V, et al. ( 2011) Prosthetic platforms in implant dentistry. J Craniofac Surg 22: 2327-2331.
- Evian CI, Kessler L, Axler J (1997) One-stage surgery with a nonsubmerged implant system. CompendContinEduc Dent 18: 1091-1098.
- Naenni N, BindlA, Sax C, Hämmerle C, Sailer I (2015) A randomized controlled clinical trial of 3-unit posterior zirconia-ceramic fixed dental prostheses (FDP) with layered or pressed veneering ceramics: 3-year results. J Dent 43: 1365-1370.
- Wadhwani CP (2013) Peri-implant disease and cemented implant restorations: A multifactorial etiology. Compend Contin Educ Dent 7: 32-37.
Citation: Karl M, Schmidtler G (2016) Combining Traditional and CAD/CAM Techniques for Simplifying Dental Implant Therapy. J Med Imp Surg 1: 103.
Copyright: © 2016 Karl M, et al. This is an open-access article distributed under the terms of the Creative Commons Attribution License, which permits unrestricted use, distribution, and reproduction in any medium, provided the original author and source are credited.
Share This Article
Recommended Conferences
10th International Conference and Expo on Computer Graphics & Animation
Vancouver, Canada
7th International Conference on Anti-Cancer Drugs & Therapies
Vancouver, Canada
9th World Conference on Nursing Education & Nursing Practice
Toronto, Canada
42nd Global Conference on Nursing Care & Patient Safety
Toronto, CanadaRecommended Journals
Open Access Journals
Article Usage
- Total views: 12157
- [From(publication date): 5-2016 - Nov 21, 2024]
- Breakdown by view type
- HTML page views: 11389
- PDF downloads: 768
