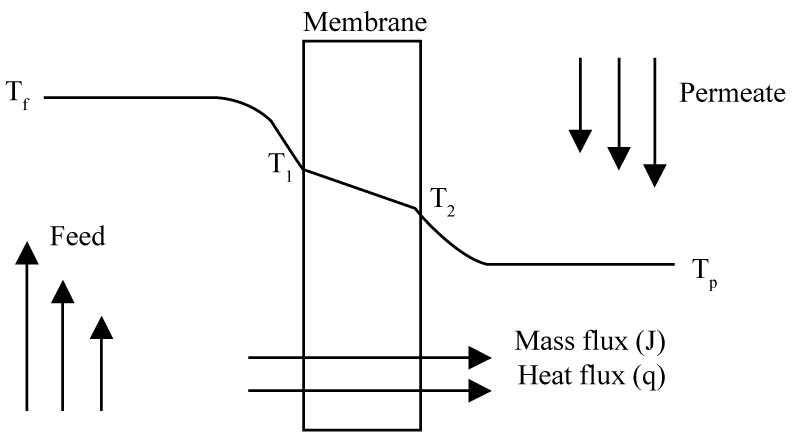
Figure 2:
Heat and Mass Transfer in DCMD.