|
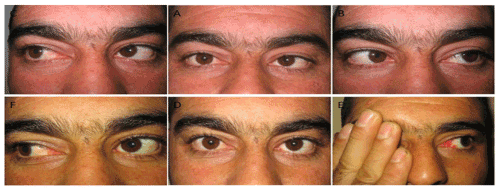
| Figure 4: A: Pre-operative picture of patient 4 in primary position. B: Preoperative picture of patient 4 showing left abduction deficit (-2). C: Pre-operative picture of patient 4 showing left adduction deficit (-1). D: Post-operative picture of patient 4 in primary position. E: Post-operative picture of patient 4 showing no left abduction deficit. F: Post-operative picture of patient 4 showing left adduction deficit (-1). |